Microsoft Flow + RPA = PowerAutomate
During the keynote at Ignite 2019, Microsoft CEO Satya Nadella announced that Microsoft Flow was gaining Robotic Process Automation (RPA) capabilities.
From now on, Flow will have the following types of Flows:
- Automated Flows
- Business Process Flows (BPF)
- Instant Flows
- UI Flows (NEW!)
Power Automate
Satya Nadella also announced a significant name change for Microsoft Flow. The workflow part of the Power Platform is now called Power Automate. This replaces the umbrella term Microsoft Flow, while the names of the different workflow types stay the same.
Robotic Process Automation
What is Robotic Process Automation (RPA)?
According to Gartner, RPA is:
"... a digital enablement technology that predominantly leverages a combination of user interface (UI) and surface-level features to create scripts that automate routine, predictable data transcription work."
Why is this an exciting step for Microsoft? There have been several highly successful companies in this area: UI Path, Blue Prism and Automation Anywhere, to name a few.
For Microsoft, adding RPA capabilities closes some gaps. It creates new opportunities for the many companies using legacy software that doesn’t have a REST API. The new features make it possible for companies to use UI Flows to bridge that REST API gap. Imagine having a legacy system where people enter data all day. You can use Power Automate to create a UI Flow that now automates this activity.
Attended RPA vs. unattended RPA
Currently, the UI Flows that you can create are only attended RPA. This is when you have to be logged in at the workstation where the RPA script is running.
The next step will be, of course, unattended RPA, so that you can run RPA scripts on, for instance, a virtual machine without having to be present.
UI Flows
When to use UI Flows?
A key tip here is to make use of UI Flows when you don’t have an API option. So, imagine having a Flow where you have a simple process step that you can’t do with a normal Flow action. That’s when UI Flows come in handy.
How do you create a UI Flow?
You can go to the “My Flows” part on the Power Automate website where you will find a tab called “UI flows (Preview)”.
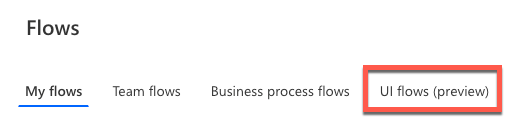
Next, you will be able to create a UI Flow by selecting the “new” button.
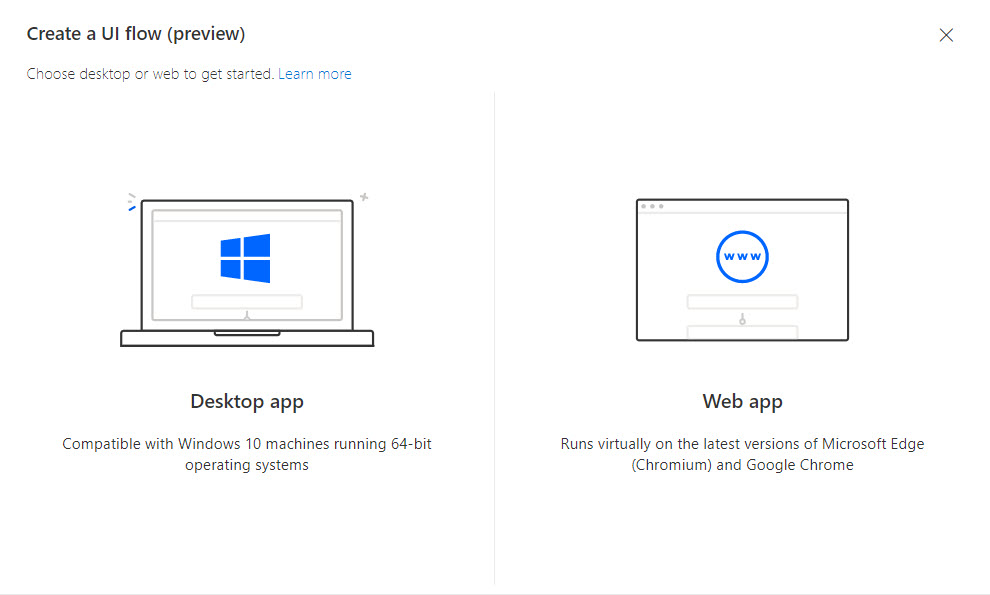
There are two types of UI Flows:
- Desktop app
- Web app
Desktop app
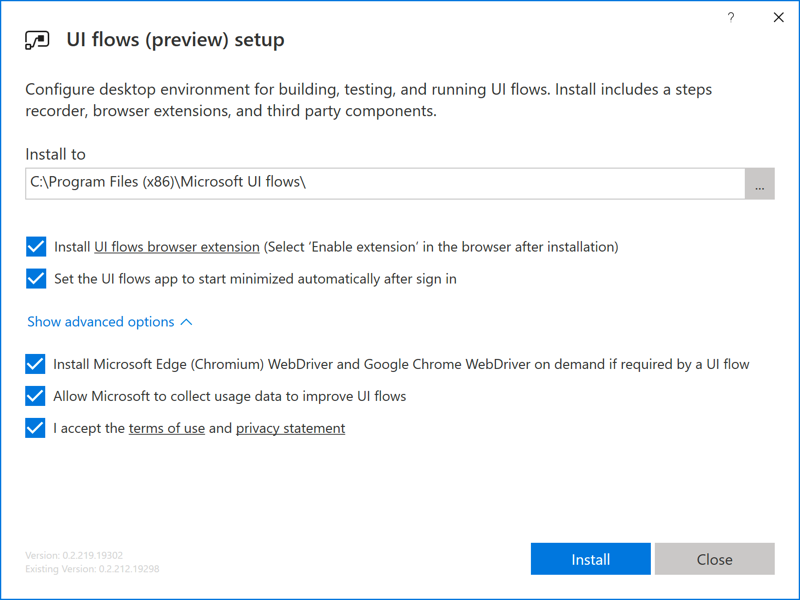
The desktop app will work on a Windows 10 machine (64-bit), which will give you the possibility to record your RPA script. To use this, you will have to install an agent (download here).
Web app
For the web app, you will have to use either Chrome or the new Edge (based on Chromium). To record a web app UI Flow, you have to install the Selenium IDE plugin (link). If you haven’t got it installed, no worries, because Power Automate will give you prompts whenever you need to install something and will guide you through the install process of the agent.
Playing the script
You can play the script from an automated Flow where you add the actions displayed below:

This means you are able to mix and match UI Flows with Automated Flows and Business Process Flows.
Advanced configuration (NO WARRANTY)
The following part is for the advanced users out there. There is a little trick you can use to configure the recorder tool even more. In the installation directory ‘C:\Program Files (x86)\Microsoft UI flows’ there is a file called ‘Microsoft.Flow.RPA.Agent.exe.config’ which you can edit in your favorite text editor. This file contains an AppSettings object which you can configure. For example, see the image below:
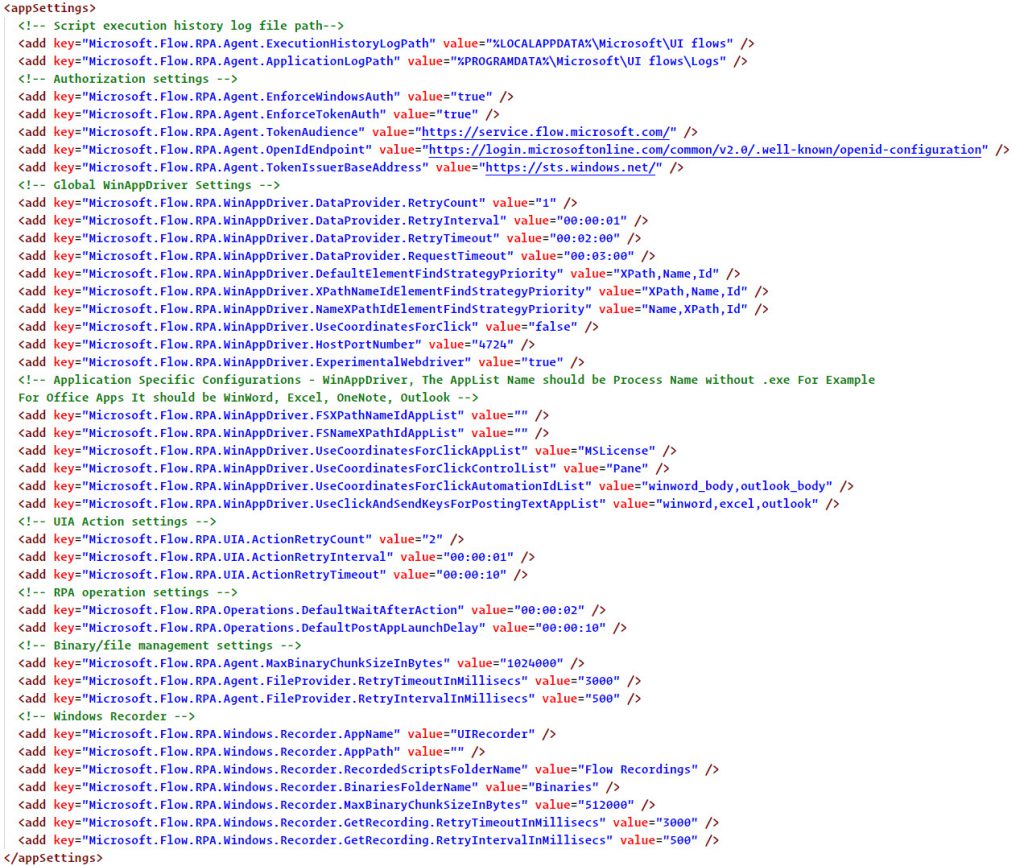
Example: Default Wait After Action
To speed up the running of your script, you can change the value of the key Microsoft.Flow.RPA.Operations.DefaultWaitAfterAction to 00:00:02.
This will lead to that the actions in your script will have a default wait value of 2 seconds after each action. You can see that in the advanced settings of the actions in your UI Flow.
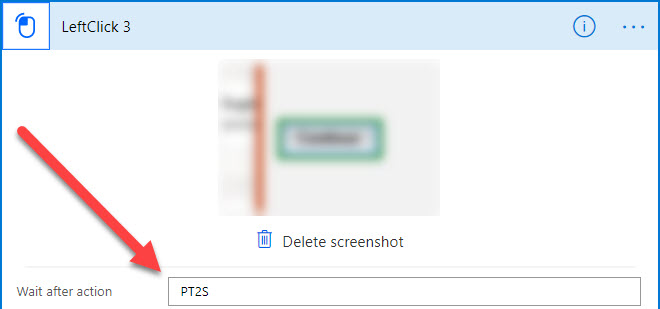
In this case, the recorder has registered a left click and it inserted the value PT2S in the Wait after action field in the action. This is the ISO-8601 standard equivalent of 2 seconds.
Read more about the ISO-8601 standard in this excellent blog post by Karina Varela.
More details?
Go to the blog about the RPA capabilities on the Power Automate website.
Featured image source: Microsoft